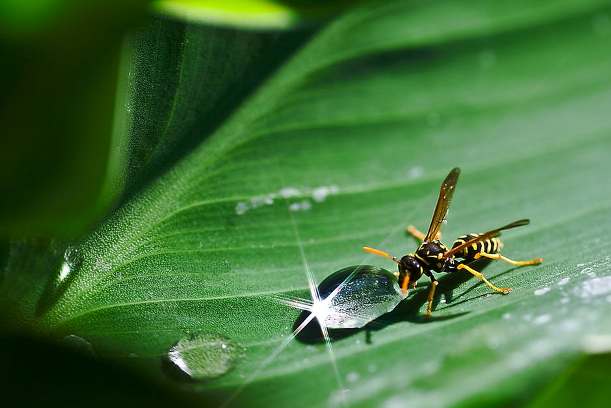
Few specialties of photography are as attractive to the photographer as macro photography. The possibility of filling monitor with details of plants, insects, objects… that go unnoticed by the naked eye and the concentration in which it submerges us are great inducements to persevere and improve the results. The shots can be indoors, outdoors, in good weather or raining… In a small meadow, we have enough land to spend hours and hours waiting for the light of the sunset.
As if that were not enough, we can delve into macro photography with an affordable financial outlay to our pockets. But the process of initiation is not simple; all our mistakes grow as our models do. That is why in this article we will talk about everything you need to know to achieve quality macro photos.
What is the macro photography and what do I need to get into it?
We call macro photography to the photography of subjects whose capture size is equal to or higher than that of our sensor. If the size of the photographed elements is between 1 and 10 times higher than that of our sensor, we would be talking about approach photography.
With the normal objectives, we observed that when reaching the minimum focusing distance the size that a butterfly can have is really small in our photography, occupying a miserable portion of the frame and preventing observing its most striking details.
If we use a compact camera we can use the macro mode, which allows us to approach very short distances of a few centimeters. Unfortunately, at this distance, it is difficult to get natural light to the subject, and if this is a bit elusive we will have scared before activating the trigger.
As if that were not enough, the macro option is enabled only in the minimum focal position of our lens and if we activate the zoom it will be impossible to achieve a size of the subject that fits in the macro or approximation category. The SLR cameras pose a greater weight and volume, but also allow greater control of the outlet, even with normal optics cannot achieve the level of expansion that we seek.
To overcome this initial limitation we have different tools, we will describe them in detail.
Approach lenses
We can place an approach lens on the front of the lens that manages to converge the rays of light and thus facilitates the approach and that the model occupies more surfaces in the composition. This capacity to approach us is measured in diopters and we can acquire lenses of between one and ten diopters. These simple lenses are cheap but significantly reduce the quality of the shot at the edges of the lens and can introduce aberrations. To avoid this, an achromatic lens can be acquired, actually formed by two lenses that are corrected between them.
Approach lenses count in your favor with:
- A great ease of use.
- It is not necessary to increase the exposure time, since they do not reduce the light that reaches the sensor.
- Do not disassemble the lens for its use.
- Negligible weight.
- Reasonable price.
They exist in the catalog of the main manufacturers, such as B+W, Hoya or Canon, in almost all diameters. The lenses of 0.5 and 1 diopter are indicated with objectives of length between 85 and 200 mm. The lenses of 2 to 4 diopters are more suitable for standard and angular lenses. With lenses of 4 or more diopters in high-focal lenses, large magnification ratios are achieved, although at the expense of great blurring at the edges and lack of definition.
But if we have a manual lens (with diaphragm control on the lens itself) we can use it as a high-quality focusing lens. For this, we need a cheap ring that has a male thread on both sides. There are different measures to adapt almost any objective. We can calculate the magnification capacity by dividing the focal length of the lens that is fixed to the camera between which we have invested.
Therefore 50 mm that we invest on a 200 mm gives us an enlargement of 200/50 = 4 increases. Not bad for an adapter that costs a few euros. It is convenient that the objective to invest has at least the diameter of the other or it will be very easy for you to make a vignette.
Cylinder Liners
A wide-angle lens is a lens that is designed so that something very large (a landscape) is compressed to the size of our sensor, something much smaller. If we can place the objective in reverse, that is, with the bayonet looking for the subject, we will achieve an important approach while the objective continues to work in the conditions for which it was created.
The cylinder liners do not retain the automatic diaphragm, so it is necessary to close the diaphragm manually before making the exposure, so we will need a lens with diaphragm ring (something less and less frequent). If we do not have it we can only use it with the position of the most closed diaphragm in Nikon or more open in Canon. We can overcome this by manually activating the cam that transmits the position of the diaphragm. But the big problem for this excellent and affordable method is that the body stops being in contact with the CPU of the targets that have it incorporated, which can mean the loss of some functions in the camera, including the shot itself.
In Nikon there is an adapter that allows you to close the diaphragm with the help of a trigger cable, thus avoiding having to approach a fearful insect and transmit vibrations.
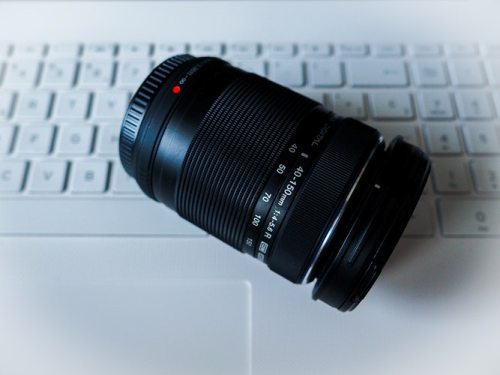
Rings or extension tubes
If you look at it as you focus closer the objective becomes longer, the lenses of the body are separated (except in the most modern objectives of internal focus). The next strategy of approach is precisely to separate the objective of the sensor by means of interposed rings.
These extension rings lack lenses and we can buy them for a few euros. But I recommend you invest in something worth staying in your backpack for a few years. The cheaper rings can filter light in the joints between them or have gaps with which the plane of focus would not be parallel to the sensor.
For many cameras, it is essential to maintain electronic contact with the objective or even refuse to shoot; in these cases it is necessary to acquire rings with electrical contacts, which are more expensive. It will also be good for us to have electrical contacts if we intend to maintain the autofocus. Before deciding, check if you can use tubes without contacts, so you do not buy twice.
The rings are usually sold in a three-tube kit, although they can also be purchased independently. The extension rings have the disadvantage of reducing the amount of light that reaches the sensor proportionally to the extension used. So in low light situations, it may be necessary to use flash, long exposure times or high sensitivities.
Bellows
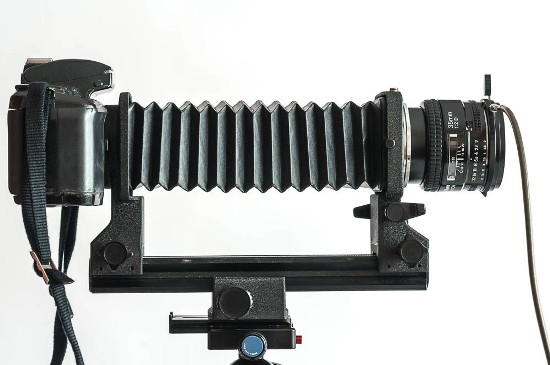
It is a mechanism that allows separating the objective of the camera progressively. It is expensive, delicate and heavy, so I would only recommend it to people with macro experience who need to reach extensions of 5 to 10 magnifications.
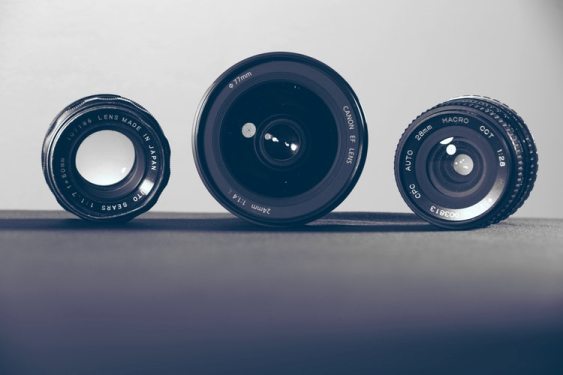
Macro lens
This is the best solution for close-up photography, they are optics that have been created to offer their best performance at short distances and that incorporate in the design a long helicoid that acts directly as extension rings. Its only drawback is its price … But with it we can shoot without accessories on a scale of 1:1, and even 5:1 if you are Canon users and you can use the Canon MP-E 65mm f/2.8, which offers an application capacity of between 1-5 increases.
There is 50-60 mm objective ideal for flowers and inert motives. For slightly collaborating animals it is advisable at least 105 mm, but I would recommend something longer, in the environment of 150-200 mm, optics that also capture a lower proportion of the bottom and therefore it is easier to choose one that suits our interests.
In the second hand market, we will find manual macro targets at a good price. One important thing: there is no bad macro goal. All, even the old ones, have a high quality that will surely delight a professional photographer for a very contained price. The fact that they are manual it does not present any inconvenience, since the autofocus is very little operational in macro (even with the most advanced models).
We can combine macro lenses with zoom lenses and extension rings to achieve even more magnification.
Tripod, monopod and bags
It is essential to use a good tripod that guarantees the absence of movement and vibrations since the increases also exponentially increase the effects of vibrations, however minimal they may be.
It is necessary that the tripod allows us smooth and precise movements and it would be advisable that we have an adjustment slide. There are numerous photographers who prefer a panoramic kneecap for macro.
Some kneecap type Arca Swiss have sliding plates, if we acquire a long one (8-12 cm) it will allow us to have some room to maneuver when placing the camera and modify its horizontal position without needing to vary the location of the tripod, in this way we can adjust the distance to focus or adjust the magnification in a very comfortable way.
It is also very interesting to be able to invert the central column, to take shots from very low height, even at the cost of being really uncomfortable.
Trigger cable
It is as necessary as the tripod, since the pressure exerted on the trigger is sufficient to produce vibrations in the camera. They are cheap and easy to use, what else can we ask for?
For the bellows, a specific trigger cable with two outputs is better. One operates a mechanism that closes the diaphragm to the firing position and the other acts on the shutter.
We can replace the cable with the self-timer of the camera, but this system does not allow us to shoot at the precise moment that interests us.
Focus: Forget the autofocus
The secret to focus properly and achieve the sharpness that we seek in the specific site lies in varying the distance between the subject and the camera, not in turning the focus barrel of our optics. By varying the focus we also modify the enlargement ratio, so once the enlargement and composition have been established we will have to move the camera to the plane where the subject is in focus.
But this is not a problem, since it is really very difficult to focus with the focus ring, it is easier to move the camera a little forward or backward. And forget the autofocus, it does not work. The system will spend hours moving back and forth without achieving the plane we want.
Focusing lanes are very useful that make it possible to move the camera sagittally to the subject with precision and without the need to change the tripod place.
The wind, uncomfortable guest
One of the main disadvantages of working in the field is the persistent wind. Although it may seem that there is absolute calm when we look through the viewer we see how our flower rocks from one side to the other without stopping for a moment.
To reduce as much as possible the vibration you can use the backpack, something or the reflector that protects our subject from the action of the wind.
A useful, cheap and not very heavy resource is the use of a thick needle and several hair clips with which we will hug the trunk of the plant that we want to photograph.
There are also specific tweezers in some photography stores. The invention consists of two clips joined by a set of plastic cones, thanks to which we can locate our model where we need.
Lighting: The photographer’s raw material
The natural light is not always the best suited for macro work, although their artistic possibilities are very high when it is appropriate.
On the one hand, its quality, direction, hardness and color depend on the position of the sun and the existence of clouds. In few occasions, we will find a partially cloudy sky that produces a soft and little contrasted lighting. On the other hand and due to the combination of closed diaphragms and the extension we use in macro, it is very frequent that natural light is completely insufficient, since we can not always increase the exposure time as necessary to compensate these diaphragms. The animals tend to move and it is rare that there is no breeze to agitate the flowers and plants.
When the natural light that we have is insufficient, or its direction and quality are not ideal, it is necessary to use artificial sources of light. The electronic flash is, without doubts, the best option in the field work. They allow great mobility and combine a relatively low price with a powerful light source, easily adjustable.
To modify natural light or flash, we can use reflectors. This is the name given to a surface that reflects a large part of the light that falls on it. In the market, there are folding reflectors, of low weight and volume.
The reflectors allow us to clarify the shadows that appear on the opposite side to the focus of light and thus reduce the contrast and ugly shadows. They can be purchased in white, silver and gold. The latter can give a little warmth to flash photographs, which tend to have very cold tones. The white on the other hand is the one that produces a softer illumination.
You can build a reflector easily and cheaply by opening and cutting a Tetra-brick container to size.
The reflector will be placed in such a way that it reflects the light and comes out in the composition, and then we will slowly remove it until we stop seeing it in the viewfinder, this way we get the maximum effect. As we move it away its reflection decreases and in this way we control the density of the shadows to our liking.
Another excellent modifier of the light are the diffusers that get the parallel rays to break their directionality and that the subject receives the light from everywhere, a soft and sifted light that is very grateful.
It is important to remember that there are several basic types of lighting: frontal, lateral, zenithal … that we have to choose according to the characteristics of the model, not our comfort. Highlighting is our priority. And light, as always, is our raw material as photographers, it depends on us to make good use of it and not limit ourselves to frontal, flat and dull illuminations.
Flashes, two better than one
In macro photography we will use very often very closed diaphragms to achieve the maximum possible depth of field, if we also work in the shade to have a very soft light and we have mounted extension rings it will be necessary a very long exposure time, which can cause the photo to move if the subject is not totally static.
Another alternative is to use high sensitivities that will introduce to a greater or lesser extent an amount of noise that is not compatible with the degree of detail that we want to achieve. The best choice in these situations is the use of hand-held flash.
It is recommended that the flashes that we use can be controlled by the camera (TTL). This will avoid countless calculations and measurements and be able to concentrate on the shot itself, on deciding the most appropriate time to shoot and the best composition and not on the technical problems of its use.
Currently, computerized flashes have experienced a decrease in price that allows its acquisition for macro. Some brands like Yongnuo offer very acceptable quality products for about 100 euros. It is advisable to have at least two flashes. One will use it as a main flash and it would be good if it had a guide number of 32-40 and a secondary one with a guide number of 16-30.
If we work in a controlled environment I would recommend the manual use of the flashes, since once we have controlled the exposure we can change the composition without changing the light that reaches the sensor as could happen with a flash working in TTL mode. Manual flashes are more affordable, but it is convenient to acquire units that allow partial powers of between ½ and 1/128.
Ring flash
There are so-called ring or annular flashes that are placed on the front of the lens and produce a homogeneous lighting without shadows, it is very suitable for flowers and butterflies, but on very bright surfaces (eyes of amphibians, shells of insects, water…) produce circular reflections that many photographers think are not very aesthetic.
Its own construction produces an absence of shadows that involves a very unartistic flat lighting, for that reason I have stopped using them in favor of two or three flash units of hand. They are especially indicated for very large enlargement relationships, where the limited work space can make it impossible to illuminate the scene in any other way. They have the added advantage that they usually have a small bulb that allows us to focus more easily.
The rings work best with low focal length lenses, such as 60 mm. With objectives of the greater focal distance, the light becomes harder due to its greater distance to the subject. In return, we will have better-lit backgrounds.
The long-awaited clarity and depth of field
Behind and in front of the focus point there is a clear area that will be larger the closer the selected diaphragm (larger f-numbers). Contrary to the opening of the diaphragm, the area of sharpness decreases.
This zone of sharpness is distributed symmetrically behind and in front of the focus point with our macro models.
Unfortunately, when we work above the 1:1 ratio, diffraction phenomena occur in the lamellae of the diaphragm, which cause a great loss of definition by surrounding the finer details with a slight halo.
Due to this phenomenon, it is counterproductive to close the diaphragm a lot. We can diaphragm up to f:16 with a ratio less than 2:1, f:11 and even f:8 between the 2:1 and 4:1 relationships, above these ratios it is better not to get an f:5.6. This for Full Frame sensors, if our camera is APS it is better to use a lower value than each of the proposed ones. But do not be sorry, since the smaller size of the sensor compensates the depth of field that we lose by diffraction and thus f:11 in APS we can say that it equals f:16 in a full frame.
The capture size of our sensor is also important in diffraction: the greater the number of pixels for a given sensor size, the more diffraction will influence it.
If the area of sharpness is insufficient for what we need the only thing we can do is to place the subject as parallel to the plane of the film, or reduce somewhat the scale of the image and then selectively expand the area that interests us.
Another alternative is to make a series of photos parallel to the sensor in which we are superimposing the focus area. Then with a suitable program like Photoshop, Zerene Staker or Helicon Focus we can add each sharp area in a single file. This technique is called stacking and is increasingly used.
In any case, it is necessary that our shots go through a process of focus to look as they should on screen or print. There are many techniques that can help us.
The aesthetics of the composition
At first, we will be content with making the shot look sharp, but as we master the technique we will need to move forward on composition and aesthetics issues. In this way, the background is essential to be taken into account. An inadequate background will spoil the best of the photos.
Sometimes a small change of point of view is necessary so that the background goes from being a light blue to black, red or green. We have to look for the best of possibilities so that the background contributes to highlighting the subject instead of fighting with it. If we do not find an adequate background we can get it with a properly located cardboard.
Other topics such as the layout of the lines, the placement of the elements and their tonalities, points of interest … it is also essential to take them into account, but they exceed the limit of an article on macro and are inherently linked to the rest of photographic specialties.
Choose the reason
The first thing we have to do, obviously is to look for a reason. Sometimes the motives assail us, at other times it is necessary to look for them and when we find them improve a little bit, moving a little bit that stick that hinders…..
It is essential to take the choice of the reason calmly, in reality; it will be absolutely useless all subsequent work if this is not interesting or appropriate.
If you have several subjects, for example, a bunch of flowers, do not stay with the first one that you find, select the one with the best aspect, the flower that is at its highest point, the one with the best light, or the one that more convenient.
Once you have chosen the motive, look for the best framing. Often we will find several suitable frames; in that case, we will make several photographs, because it is impossible to capture everything in one. Sometimes a photo of detail will be necessary, another one of set… We will avoid focusing the subject on the frame and exaggerate the bites. Do not place the object on the edges of the composition; leave a little space around it.
Check the quality of the light and intensify it if necessary with a flash unit or a reflector. Check that there are no conditions that recommend compensation for exposure (very dark or very clear subjects, great contrast …).
Look closely at the light conditions of the subject and think if they are suitable. If you have little light you can contribute more with the help of one or more flashes. If what you do not like is the quality of light can be improved by returning at another time, when the sun has a better angle, or providing the adequate light with a studied placement of the flashes and reflectors.
Finally, activate the manual lifting of the mirror if the camera has this option and press the trigger without suddenness.